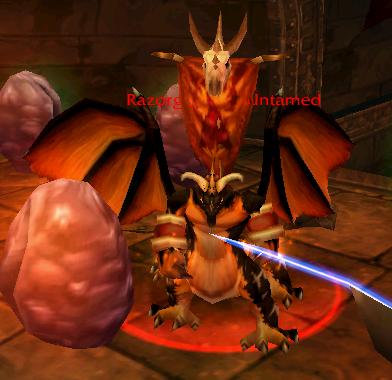
Razorgore the Untamed is the first boss of the Blackwing Lair, a tough , yet possibly very entertaining encounter.
Is is recommended that you try him and BWL in general only if your guild or raid had passed at least Majordomo in MC, (as BWL is harder than MC ), otherwise it would be just a loss of time and repair money.
Razorgore's location is a room filled with 30 large dragon eggs, much like the ones found in UBRS (Leroooooy!, that's right), just that these ones can be destroyed only with Razorgore's help, and in the following you'll see how.
The fight starts by aggroing the controllers on the west platform, killing them and triggering the spawn of adds (they appear in about 40 seconds after that). Kill Grethok and his adds and remember that and this
stage one it's all about managing the number of the adds and destroying the eggs, as quickly as possible, as there is a risk that the numbers of the mobs should raise to an incontrolable situation.
On the west end of the room there is an Orb, used to mind control Razorgore through stage 1 of the fight; the ideal situation consists of 2 controllers (paladins -bubble and control- for an alliance raid or anything else suitable, but keep in mind that the controllers must survive during this phase, as the use of Razorogore's abilities is crucial for the success of this stage) taking turns in mind controlling Razorgore.
The mind controlling process can begin even before the kill of Grethok and should be targeted on destroying the eggs (95% of the time), the only case in which you won't use this ability is when it is on cooldown. Then you might want to use the "sleep dragonkin" ability, as the fireball volley usually draws too much aggro on Razorgore, which, as you might guess, must stay alive during phase 1.
The adds that i've been mentioning so far are of 3 types: melee (legionnaires), dragonkin and mages. As you prolly expect, the melee ones (first 2 types) are hard hitting, heavy armoured etc. kind of mobs, while
the mages are more fragile but more dangerous too due to their AOE attacks. The easier way is to keep the adds population mainly consisting of melee and the dps group in your raid should nuke the mages asap; of
course, it's not a piece of cake to tank the melee damagers, but it's preferable to being batch killed by the mages. Healers, heal, tankers, tank and dps-ers, do the dps! It's that simple, isn't it? Now, balance is
everything. There's no need to keep the orcs alive with any cost, of course you must decimate them to keep a controllable population, but only if the mages are being taken care of, as killing them is the highest
priority for you. Tip: mind control the orcs and use them to kill the dragonkins, as they have 400% damage bonus against them. If the dragonkin number is too big, use the druids to sleep a part of them, anytime
required (and it is required most of the stage, in fact). Any other classes that can croud control should do so (sleep, sheep, fear, scream), in an organized fashion and if possible by taking turns, in order to keep a
even threat. During stage 1 also try to kite as much as possible, a horde raid could use the shamans' earth binding totems, everybody can use the hunters' traps etc.
By the end, the chaos is spreading and the numbers of the adds raises insanely, but do not panic, as all of them will go away when the last egg is destroyed. In order to make it to this final moment of stage
1,when there's only 3-4 eggs left, use all your CC abilities and chain fear everything, don't focus on killing, but escaping them.
Phase 2: time to kill Razorgore itself.
Razorgore has, beside his melee attack, a hurting fireball volley and a conflagrate attack that gets you out of your control, burning you and the people around you. This is the reason for dps-ing him mainly ranged
and using more than one tank. The MT is facing Razorgore, the backup tanks are behind him. When the unfortunate conflag event happens, the MT also loses aggro, so a backup tank should take his palce immediately, while the burning ex-MT steps back in order to protect the others of catching fire.
As you might have noticed, there's a lot of fire involved, so it's not a bad idea to bring along some fire resistance equipment, but bear in mind that you'll not leave the "in combat" state between the 2 stages of
the fight, so no gear switching is possible.
Try to take advantage of the large size of the room in the unfortunate case a healer should die. have a druid rez him in-combat, but as far away as possible from the action. The ressurected healer will be out of
combat and will be able to bring back some of the other fallen comrades.
However, it's best not to come to this, as the unpredicted can interfear and mess the things up.
2 comments:
Me and my guild followed this and succeeded. Thanks
WTF? I screamed Leeroy and ran inside to do the LJ thing but we all wiped. No one lived... This strategy is flawed...
Post a Comment